


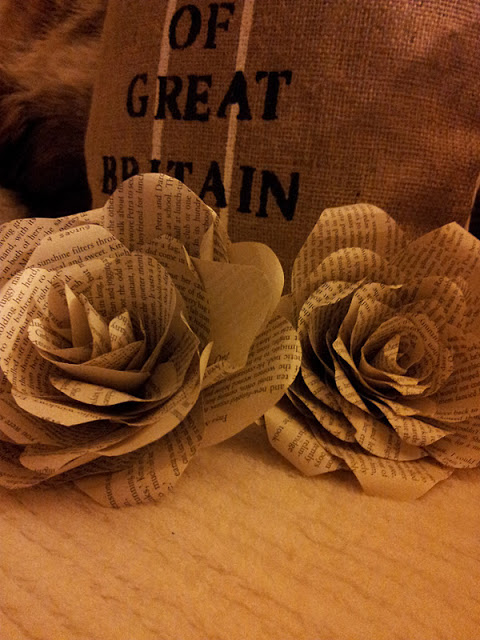
how to make this flower
pull out, 6 pages from a book, and cut the petals. you need six of each size, like below, going from small to big


after all the petals are added, you can then roll some of the petals over the stick again if you want to make it more curly,
its so simple and takes no time, i used an old book i got free with a mag so this cost me nothing apart from the glue.
its so simple and takes no time, i used an old book i got free with a mag so this cost me nothing apart from the glue.
Here are some other homemade crafts
I handmade the heart

I made this by getting matchboxes and putting
them between two ceramic tiles.


She was made when i was around 9-10 years old.

I had an idea one day by watching the show called Happy Feet
and you never know what idea i came up with.

I made him to cover the Febreze spray bottle. It hide that ugly bottles
Lace Doily Bowl

searching for doilies – not the paper kind, nice crochet and lace doilies – for a DIY project. I finally found some online, so I ordered a bunch figuring I’d use them for something. Sure enough, inspiration struck soon after and I decided to make some into bowls! I had heard of covering balloons with them to make really pretty lanterns (similar to our “thought bubbles”), and it turns out you can make a doily into a bowl using a very similar technique.

Choose a bowl that will allow you to drape the doily over the bottom of to create a bowl shape.


doilies already and don’t want to purchase fabric stiffener, you can make your own! Just mix equal parts white glue and water.

1,2,3: Turn your bowl upside down, soak the doily in fabric stiffener, and drape the doily on the bottom of the bowl.

harden.

Experiment with different shapes and sizes! In the morning, your lace bowls will be ready for use.

Here is what they look like after they are done

VINTAGE DOILY PUMPKINS

Materials:
- Vintage doilies in shades of white, cream, and ecru
- Dried real gourds or craft store faux pumpkins and gourds
- Mod Podge for Fabric
- Paintbrush or foam brush
- Spray paint in an off-white or ivory
- Tin foil
- Wax paper
The only prep work I did prior to painting was covering the gourd stem with tin foil.


I usually cover my work table with wax paper when I work with Mod Podge. I followed the directions on the bottle when applying the Fabric Mod Podge to the doilies.

After coating one side of the doilies, place them on the pumpkin and tap all the edges down with your fingers. Once the pieces are adhered to the pumpkins, wait for two hours while the initial coat dries. Then a topcoat of Mod Podge can be applied to the entire piece.
A list of HOW TO

No comments:
Post a Comment